Basic Excel Driving with Python
Now it’s getting interesting. Reading and writing spreadsheets with XLRD and XLWT (as discussed in the two previous posts is sufficient for many tasks and you don’t even need a copy of Excel to do it. But to really open up your data and fully extract all the information possible, you’ll need Excel and its powerful set of functions and features like pivot tables and charting.
For starters, let’s do some simple operations using Python to invoke Excel, add a spreadsheet, insert some data, then save the results to a spreadsheet file. You can play along at home by entering the program text exactly as I’ve described below. I’ve tested this exercise with Python 3.7.3 and Excel 2016, however, this code was originally developed on Python 2.7 and Excel 2007 (the screenshots were taken with Excel 2007) and should run without issue. A prerequisite for this exercise is Python, the pywin32 module, and a copy of Microsoft Excel. See Installing Python for more information on installing both Python and pywin32.
Here is the complete script we’ll be entering using IDLE, the Python interactive development tool. Feel free to copy and paste as you work through this exercise. You can download this script from GitHub at driving.py
#
# driving.py
#
import win32com.client as win32

excel = win32.gencache.EnsureDispatch('Excel.Application')
excel.Visible = True
wb = excel.Workbooks.Add()
ws = wb.Worksheets('Sheet1')
ws.Name = 'Built with Python'
ws.Cells(1, 1).Value = 'Hello Excel'
print(ws.Cells(1, 1).Value)
for i in range(1, 5):
    ws.Cells(2, i).Value = i  # Don't do this
ws.Range(ws.Cells(3, 1), ws.Cells(3, 4)).Value = [5, 6, 7, 8]
ws.Range("A4:D4").Value = [i for i in range(9, 13)]
ws.Cells(5, 4).Formula = '=SUM(A2:D4)'
ws.Cells(5, 4).Font.Size = 16
ws.Cells(5, 4).Font.Bold = True
What follows is a step-by-step guide to entering this script and monitoring the result.
-
Start IDLE
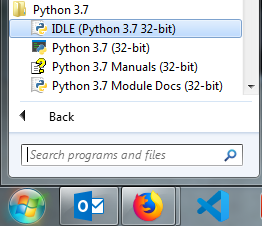
To start IDLE, click the Start button, click “All Programs”, and double-click IDLE within the Python directory. IDLE is the Python IDE built with the tkinter GUI toolkit and gives you an interactive interface to enter, run and save Python programs. IDLE isn’t strictly necessary for this exercise; you could use any shell command window, or even another IDE (Integrated Development Environment) such as PyCharm or Visual Studio Code.
-
Import the win32 module

If the import command was successful, you’ll see the “>>>” prompt returned. If there was a problem, such as not having the pywin32 module installed, you’ll see
Import Error: No module named win32com.client. If you see an error, install the pywin32 module as described in Installing Python. -
Start Excel
Type
excel=win32.gencache.EnsureDispatch('Excel.Application')at the prompt to start Excel. This command attaches your Python session to a running Excel process or starts Excel if it is not running. If you see the “>>>” prompt, Excel has been started or linked successfully. You won’t see the Excel application yet, but if you check your task manager you can confirm that the process is running. -
Make Excel Visible
Type
excel.Visible = Trueto make the application visible. At this point, Excel does not contain any workbooks or worksheets, we’ll add those in the next step. To hide the application, you would typeexcel.Visible = False. -
Add a workbook, select the sheet “Sheet1” and rename it

Excel needs a workbook to serve as a container for the worksheets. A new workbook containing three sheets is added with command
wb =
 excel.Workbooks.Add()
. The commandws=wb.Worksheets('Sheet1')assigns ws to the sheet named Sheet1, and the commandws.Name ='Built with Python'changes the name of Sheet1 to “Built with Python”. Your screen should now look something like this: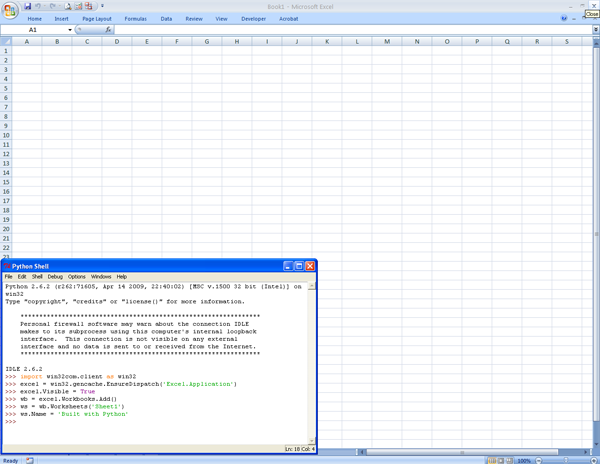
The setup is now complete and you can add data to the spreadsheet.
-
Add some text into the first cell

After typing these commands, you’ll see “Hello Excel” in cell A1 of your Excel worksheet and in your IDLE window.

There are several options for addressing cells and blocks of data in Excel; I’ll cover a few of them here. You can address individual cells with the
Cells(row,column).Valuepattern, where row and column are integer values representing the row and column location for the cell. Note that row and column counts begin from one, not zero. Use.Valueto add text, numbers and date information to the cell and use.Formulafor entering an Excel formula into the cell location. -
Populate the second row with data by using a for loop

The spreadsheet updates to display the numbers entered by the for loop:

In many cases, you’ll have lists of data to insert into or extract from the worksheet. Wrapping the
Cells(row,column).Valuepattern with a loop seems like a natural approach, but in reality, this maximizes the communication overhead between Python and Excel and results in less efficient code. It’s much better to transfer lists than individual elements whenever possible as shown in the next step. -
Populate the third and fourth rows of data

The Excel sheet now looks like this:

These commands demonstrate a better approach to populating or extracting blocks of data: the
Range().Valuepattern. With this construct, you can efficiently transfer one- or two-dimensional blocks of data. In the first example, cells (3,1) through (3,4) are assigned to the list [5, 6, 7, 8]. The next line uses the Excel-style cell address specifier “A4:D4” to assign the results of the operation[i for i in range(9,13)]. In some cases, it may be more intuitive to use the Excel-style naming. -
Assign a formula to sum the numbers you inserted

Your Excel sheet should now look like the screenshot below.

You can insert Excel formulas into cells using the
.Formulapattern. The formula is the same as if you were to enter it in Excel:=SUM(A2:D4). In this example, the sum of 12 numbers in rows 2, 3, and 4 is generated. -
Change the formatting of the formula cell

Your spreadsheet should now look like this.
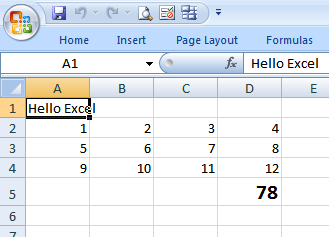
To highlight the sum, the font size and face format of the formula cell is changed to point size 16 with a bold typeface. You can change any of dozens of attributes for the various cells in the worksheet with Python.
I hope you did this exercise interactively by typing the commands and monitoring the result in Excel. You can also run this script to generate the result. When the script exits, you’ll be left with an open Excel spreadsheet just as shown in the last screenshot above.
Prerequisites
- Python (refer to http://www.python.org)
- pywin32 Python module (refer to Installing Python)
- Microsoft Excel
Source Files and Scripts
Source for the program and data text file are available on GitHub
References
Core Python Programming
Wesley Chun’s book has a chapter on Programming Microsoft Office with Win32 COM
http://groups.google.com/group/python-excel
Though this group mainly covers questions on the excellent XLRD, XLWT and XLUTILS modules, there is also some discussion on interfacing to Excel using Win32 COM
Stack Overflow
Stack Overflow is a great resource for getting questions answered on a variety of programming topics, including Python
Originally posted on September 29, 2009 / Updated November 1, 2022